

WordPress短代码自版本2.5引入以来,就被证明是最有用的功能之一。通过短代码,普通的编辑用户不需要专业的编程能力就可以发布动态的内容。
当短代码被放到文章或者页面中的时候,它会被替换成一些其他的内容。换言之,我们会找到文章或者页面里方括号([])中内容,并根据一个PHP函数,把它替换成一个适当的动态内容。
WordPress短代码的使用非常简单。比如说我们想显示给定的最新文章,我们可以使用类似下面的代码:
[recent–posts]
再进一步的,我们可以通过设定一个参数来控制现实的文章的数量:
[recent–posts posts=“5”]
更进一步的,我们可以为文章列表增加一个标题:
[recent–posts posts=“5”]Posts Heading[/recent–posts]
1. 简单的短代码
本教程的第一部分,我们将创建下面这个短代码的代码:
[recent–posts]
创建的过程非常简单,不需要很高级的PHP知识。
创建过程如下:
- 创建一个函数,当 WordPress 发现短代码的时候会调用此函数;
- 通过设置一个唯一的名称来注册短代码;
- 把注册的函数绑定到Wordpress的action上。
本教程的所有代码都可以直接放到 functions.php 中,也可以放在一个将包含在 functions.php 的单独的PHP文件中。
1.1 创建回调函数
当发现短代码的时候,它会被一个称作回调函数的一段代码所代替。所以我们先创建一个函数,从数据库中获取最新的文章。
function recent_posts_function() {
query_posts(array(‘orderby’ => ‘date’, ‘order’ => ‘DESC’ , ‘showposts’ => 1));
if (have_posts()) :
while (have_posts()) : the_post();
$return_string = ‘<a href=”‘.get_permalink().‘”>’.get_the_title().‘</a>’;
endwhile;
endif;
wp_reset_query();
return $return_string;
}
如上所示,我们查询数据库,获取最新的文章,并返回一个带有链接的字符串。值得注意的是,回调函数并不打印任何内容,而是返回一个字符串。
1.2 注册短代码
现在,我们告诉Wordpress这个函数是一个短代码:
function register_shortcodes(){
add_shortcode(‘recent-posts’, ‘recent_posts_function’);
}
当在文章的内容中发现短代码 [recent-posts] 时,将会自动调用 recent_posts_function() 函数,我们需要确保短代码的名字是唯一的,以避免重复。
1.3 Hook into WordPress
为了能够执行 recent_posts_function() 函数,我们需要把它绑定在 WordPress 的初始化钩子中。
add_action( ‘init’, ‘register_shortcodes’);
1.4 测试短代码
简单的短代码已经准备好了,现在我们需要测试它是否能够正常运行。我们创建一个新的文章(或打开一个已存在的),把下面的代码加入到文章内容中的某个位置:
[recent–posts]
发布文章并在浏览器中打开,你将看到一个执行你最新文章的链接,如下图所示:
2. 进阶短代码
2.1 短代码参数
短代码非常灵活,因为它允许我们添加参数以使它们具有更多的功能。假定我们需要显示一定数量的最新文章。为了实现这个,我们需要给短代码增加额外的选择来指定显示最新的多少篇文章。
我们需要使用两个函数,第一个是Wordpress内置的 shortcode_atts() 函数,它把用户的短代码属性与本地属性结合在一起,并填充到所需要的位置。第二个是PHP的 extract() 函数,顾名思义,它提取短代码的各个属性。
扩展我们的回调函数,我们添加一个参数,它是一个数组,从中我们可以提取到我们需要获取的文章的数量。我们查询数据库,获取指定数量的文章,并返回一个列表:
function recent_posts_function($atts){
extract(shortcode_atts(array(
‘posts’ => 1,
), $atts));

$return_string = ‘<ul>’;
query_posts(array(‘orderby’ => ‘date’, ‘order’ => ‘DESC’ , ‘showposts’ => $posts));
if (have_posts()) :
while (have_posts()) : the_post();
$return_string .= ‘<li><a href=”‘.get_permalink().‘”>’.get_the_title().‘</a></li>’;
endwhile;
endif;
$return_string .= ‘</ul>’;

wp_reset_query();
return $return_string;
}
如果用户不指定该选项,1将是默认值。我们可以添加更多的属性,使短代码接受更多的参数。用这个增强的函数,我们可以指定调用最新文章的数量:
[recent–posts posts=“5”]
在浏览器中显示时,你将看到最新的五篇文章列表:
2.2 短代码中添加内容
我们可以更进一步扩展我们的短代码,添加一些内容作为参数来传递,这将是最新文章列表的标题。为了实现此功能,我们需要在回调函数中增加第二个参数 $content ,并把它显示在列表前面的一个 <h3> 标签中。新的函数如下:
function recent_posts_function($atts, $content = null) {
extract(shortcode_atts(array(
‘posts’ => 1,
), $atts));

$return_string = ‘<h3>’.$content.‘</h3>’;
$return_string .= ‘<ul>’;
query_posts(array(‘orderby’ => ‘date’, ‘order’ => ‘DESC’ , ‘showposts’ => $posts));
if (have_posts()) :
while (have_posts()) : the_post();
$return_string .= ‘<li><a href=”‘.get_permalink().‘”>’.get_the_title().‘</a></li>’;
endwhile;
endif;
$return_string .= ‘</ul>’;

wp_reset_query();
return $return_string;
}
这种短代码类似于一个HTML标签:
[recent–posts posts=“5”]This is the list heading[/recent–posts]
除了文章列表多了一个标题,其余的内容和上一个示例是一样的: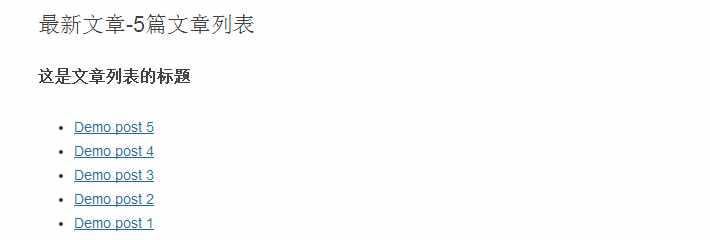
3. 在任何地方显示短代码
3.1 在侧边栏小工具中使用短代码
默认情况下,侧边栏小工具是忽略短代码的,实例如下:
[recent–posts posts=“5”]
如果你把这段代码放在小工具里的时候,你将看到类似下面的结果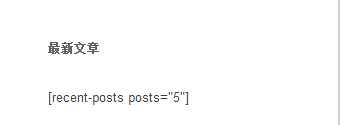
我们可以通过一行代码来启用这个函数,为了使侧边栏小工具支持短代码,添加如下的代码:
add_filter(‘widget_text’, ‘do_shortcode’);
现在不需要修改其他任何地方,刷新一下页面看看,侧边栏将会正确的显示:
同样的,在评论中启用短代码:
add_filter( ‘comment_text’, ‘do_shortcode’ );
在摘要中启用短代码:
add_filter( ‘the_excerpt’, ‘do_shortcode’);
4. TinyMCE编辑器增加短代码按钮
虽然短代码可以方便的为文章添加动态内容,但是这对于普通用户来说可能还是有点复杂,尤其是当参数比较多的时候。大多数用户对于类HTML代码并不熟悉,然而要使用短代码,他们必须记住具体的语法与参数,因为即使是一个小小的语法错误,都可能导致意想不到的结果。
要解决这个,我们可以给 TinyMCE编辑器增加一个按钮,使用户可以通过简单的单击来增加短代码。创建这个按钮仅需两个步骤:
- 为这个按钮创建一个JS文件
- 注册按钮与JS文件
4.1 通过JS文件创建按钮
JS文件是通过 TinyMCE API 来注册 TinyMCE 插件的。我们在主题的 js 文件夹下创建 recent-posts.js ,并贴进去下面的代码(需要把图片文件也放在这里):
(function() {
tinymce.create(‘tinymce.plugins.recentposts’, {
init : function(ed, url) {
ed.addButton(‘recentposts’, {
title : ‘Recent posts’,
image : url+‘/recentpostsbutton.png’,
onclick : function() {
var posts = prompt(“调用文章数量”, “1”);
var text = prompt(“列表标题”, “这里是文章列表标题”);

if (text != null && text != ”){
if (posts != null && posts != ”)
ed.execCommand(‘mceInsertContent’, false, ‘[recent-posts posts=”‘+posts+‘”]’+text+‘[/recent-posts]’);
else
ed.execCommand(‘mceInsertContent’, false, ‘[recent-posts]’+text+‘[/recent-posts]’);
}
else{
if (posts != null && posts != ”)
ed.execCommand(‘mceInsertContent’, false, ‘[recent-posts posts=”‘+posts+‘”]’);
else
ed.execCommand(‘mceInsertContent’, false, ‘[recent-posts]’);
}
}
});
},
createControl : function(n, cm) {
return null;
},
getInfo : function() {
return {
longname : “Recent Posts”,
author : ‘Specs’,
authorurl : ‘https://9iphp.com’,
infourl : ‘https://9iphp.com/opensystem/wordpress/1094.html’,
version : “1.0”
};
}
});
tinymce.PluginManager.add(‘recentposts’, tinymce.plugins.recentposts);
})();
我们通过调用 tinymce.create() 创建了一个插件。
代码中最重要的是 init() 函数,我们定义了一个名字,一个图标文件及 onclick() 事件处理程序。
在 onclick() 函数的前两行,弹出两个对话框让用户输入调用文章数量及列表标题两个参数,然后根据用户输入,把生成的短代码插入到编辑器中。
最后,TinyMCE插件通过 add() 函数添加到 PluginManager。现在我们已经成功的整合了
[recent-posts]
短代码到Wordpress中。
4.2 注册按钮及TinyMCE插件
创建完 JS 文件后,我们现在需要注册它和短代码按钮。所以我们创建两个函数并把它们绑定到合适的Wordpress过滤器中。
第一个叫做 register_button() 的函数把短代码添加到按钮数组中,在现有按钮和新按钮之间添加分割线。
function register_button( $buttons ) {
array_push( $buttons, “|”, “recentposts” );
return $buttons;
}
第二个函数 add_plugin() 指出JS文件的路径及文件名。
function add_plugin( $plugin_array ) {
$plugin_array[‘recentposts’] = get_template_directory_uri() . ‘/js/recent-posts.js’;
return $plugin_array;
}
下一步是添加包含前面两个函数的过滤器。
register_button() 函数绑定到 mce_buttons 过滤器,这个会在编辑器加载插件的时候执行;
add_plugin() 函数绑定到 mce_external_plugins 过滤器,当加载按钮的时候执行。
function my_recent_posts_button() {

if ( ! current_user_can(‘edit_posts’) && ! current_user_can(‘edit_pages’) ) {
return;
}

if ( get_user_option(‘rich_editing’) == ‘true’ ) {
add_filter( ‘mce_external_plugins’, ‘add_plugin’ );
add_filter( ‘mce_buttons’, ‘register_button’ );
}

}
当用户没有对文章在可视化编辑器中编辑的权限时,前面的函数不会执行。
最后把函数勾到Wordpress初始化函数
add_action(‘init’, ‘my_recent_posts_button’);
为了检测代码是否正确,我们打开一篇新的文章,这时一个我们刚刚定义的按钮是不是已经出现在第一行的末尾了?如下图所示: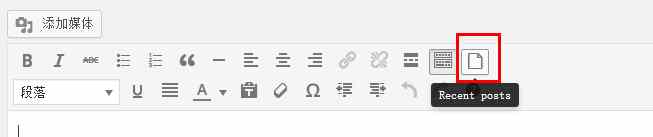
点击按钮的时候,会弹出对话框让我们输入调用文章的数量: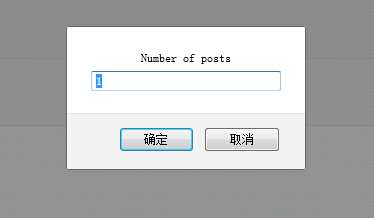 输入完点击确定后,会弹出第二个对话框,让我们输入列表的标题:
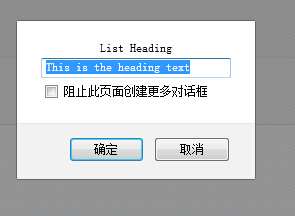
参数留空的话,不会出现在最后的代码中。最后,短代码会添加到编辑器中: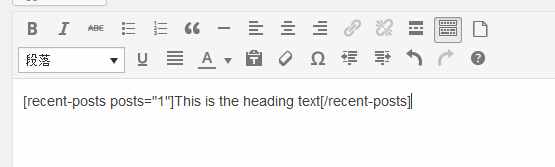


请先 !